GNU Radio Setup
The Pybombs way
sudo pip install setuptools
sudo pip install git+git://github.com/gnuradio/pybombs.git
In your workdirectory ~/wrk generate a folder for pybombs to use as a prefix. This will install all sources and binaries into that prefix to make sure it’ll be separated from the system library and bin paths. Resulting in a clean environment:
cd ~/wrk
mkdir grc_wrk
pybombs recipes add gr-recipes git+https://github.com/gnuradio/gr-recipes.git
pybombs prefix init -a default ~/wrk/grc_wrk/default/ -R gnuradio-default
Now it’ll pull all required sources and build gnuradio companion. A few miles of output text will be generated on the screen and it’ll take a good amount of time. So time to mess up the lab or work through your email inbox.
After setup completed do:
cd ~/wrk/grc_wrk/default
source ./setup_env.sh
This enables the GNU Radio environment installed with pybombs…
Let’s add some more GR-* OOT Modules and GQRX
pybombs install gr-osmosdr
pybombs install gqrx
pybombs install gr-iio
sudo ldconfig
volk_profile
Volk profile will create a profile to compute FFT optimized for the system it runs on. It’ll take quite a while, but will result in better graphics performance. The graphics performance in a VM is not good anyway. To use high-performance tools like gr-fosphor a native setup is required.
Only run the following 3 lines, if you use an USRP:
sudo cp ~/wrk/grc_wrk/default/lib/uhd/utils/uhd-usrp.rules /etc/udev/rules.d/uhd-usrp.rules
sudo udevadm control --reload-rules
sudo udevadm trigger
Other OOT Modules I’d suggest to take a look at is:
- gr-paint https://github.com/drmpeg/gr-paint
- gr-gsm https://github.com/ptrkrysik/gr-gsm ….Ohhm, only use if you operate a cell network for development purposes!
- gr-ieee802-11 https://github.com/bastibl/gr-ieee802-11 https://github.com/bastibl/gr-ieee802-15-4
- re-DECTed > https://github.com/znuh/re-DECTed
- rtty/psk31 stuff: > https://github.com/bitglue/gr-radioteletype
- Must-have: when not in a VM, using a native Linux PC with a good GPU: gr-fosphor https://github.com/osmocom/gr-fosphor ( hint: when running on a recent PC hardware…. do a
sudo apt install libfreetype6-dev ocl-icd-opencl-dev python-openglbefore installing.)
Most of them can be installed using the default pybombs recipes….
Add GRC environment to user profile
In a terminal window run:
mkdir ~/bin
echo 'source ~/wrk/grc_wrk/default/setup_env.sh' >> ~/.profile
echo 'source ~/wrk/grc_wrk/default/setup_env.sh' >> ~/.bashrc
echo 'export PATH=~/wrk/bin:$PATH' >> ~/.profile
echo 'export PATH=~/wrk/bin:$PATH' >> ~/.bashrc
Reboot, or login/logout!
Installing OOT Modules from source
Since we’ve installed GNU Radio in it’s own prefix directory custom OOT modules e.g. GR-LORA must be built towards that directory.
cd ~/wrk
git clone git://github.com/BastilleResearch/gr-lora.git
cd gr-lora
mkdir build && cd build
cmake ../
make && make install
sudo ldconfig
The cmake switch -DCMAKE_INSTALL_PREFIX=~/wrk/grc_wrk/default will ensure to target the right prefix. Keep this in mind for your further installations of OOT modules.
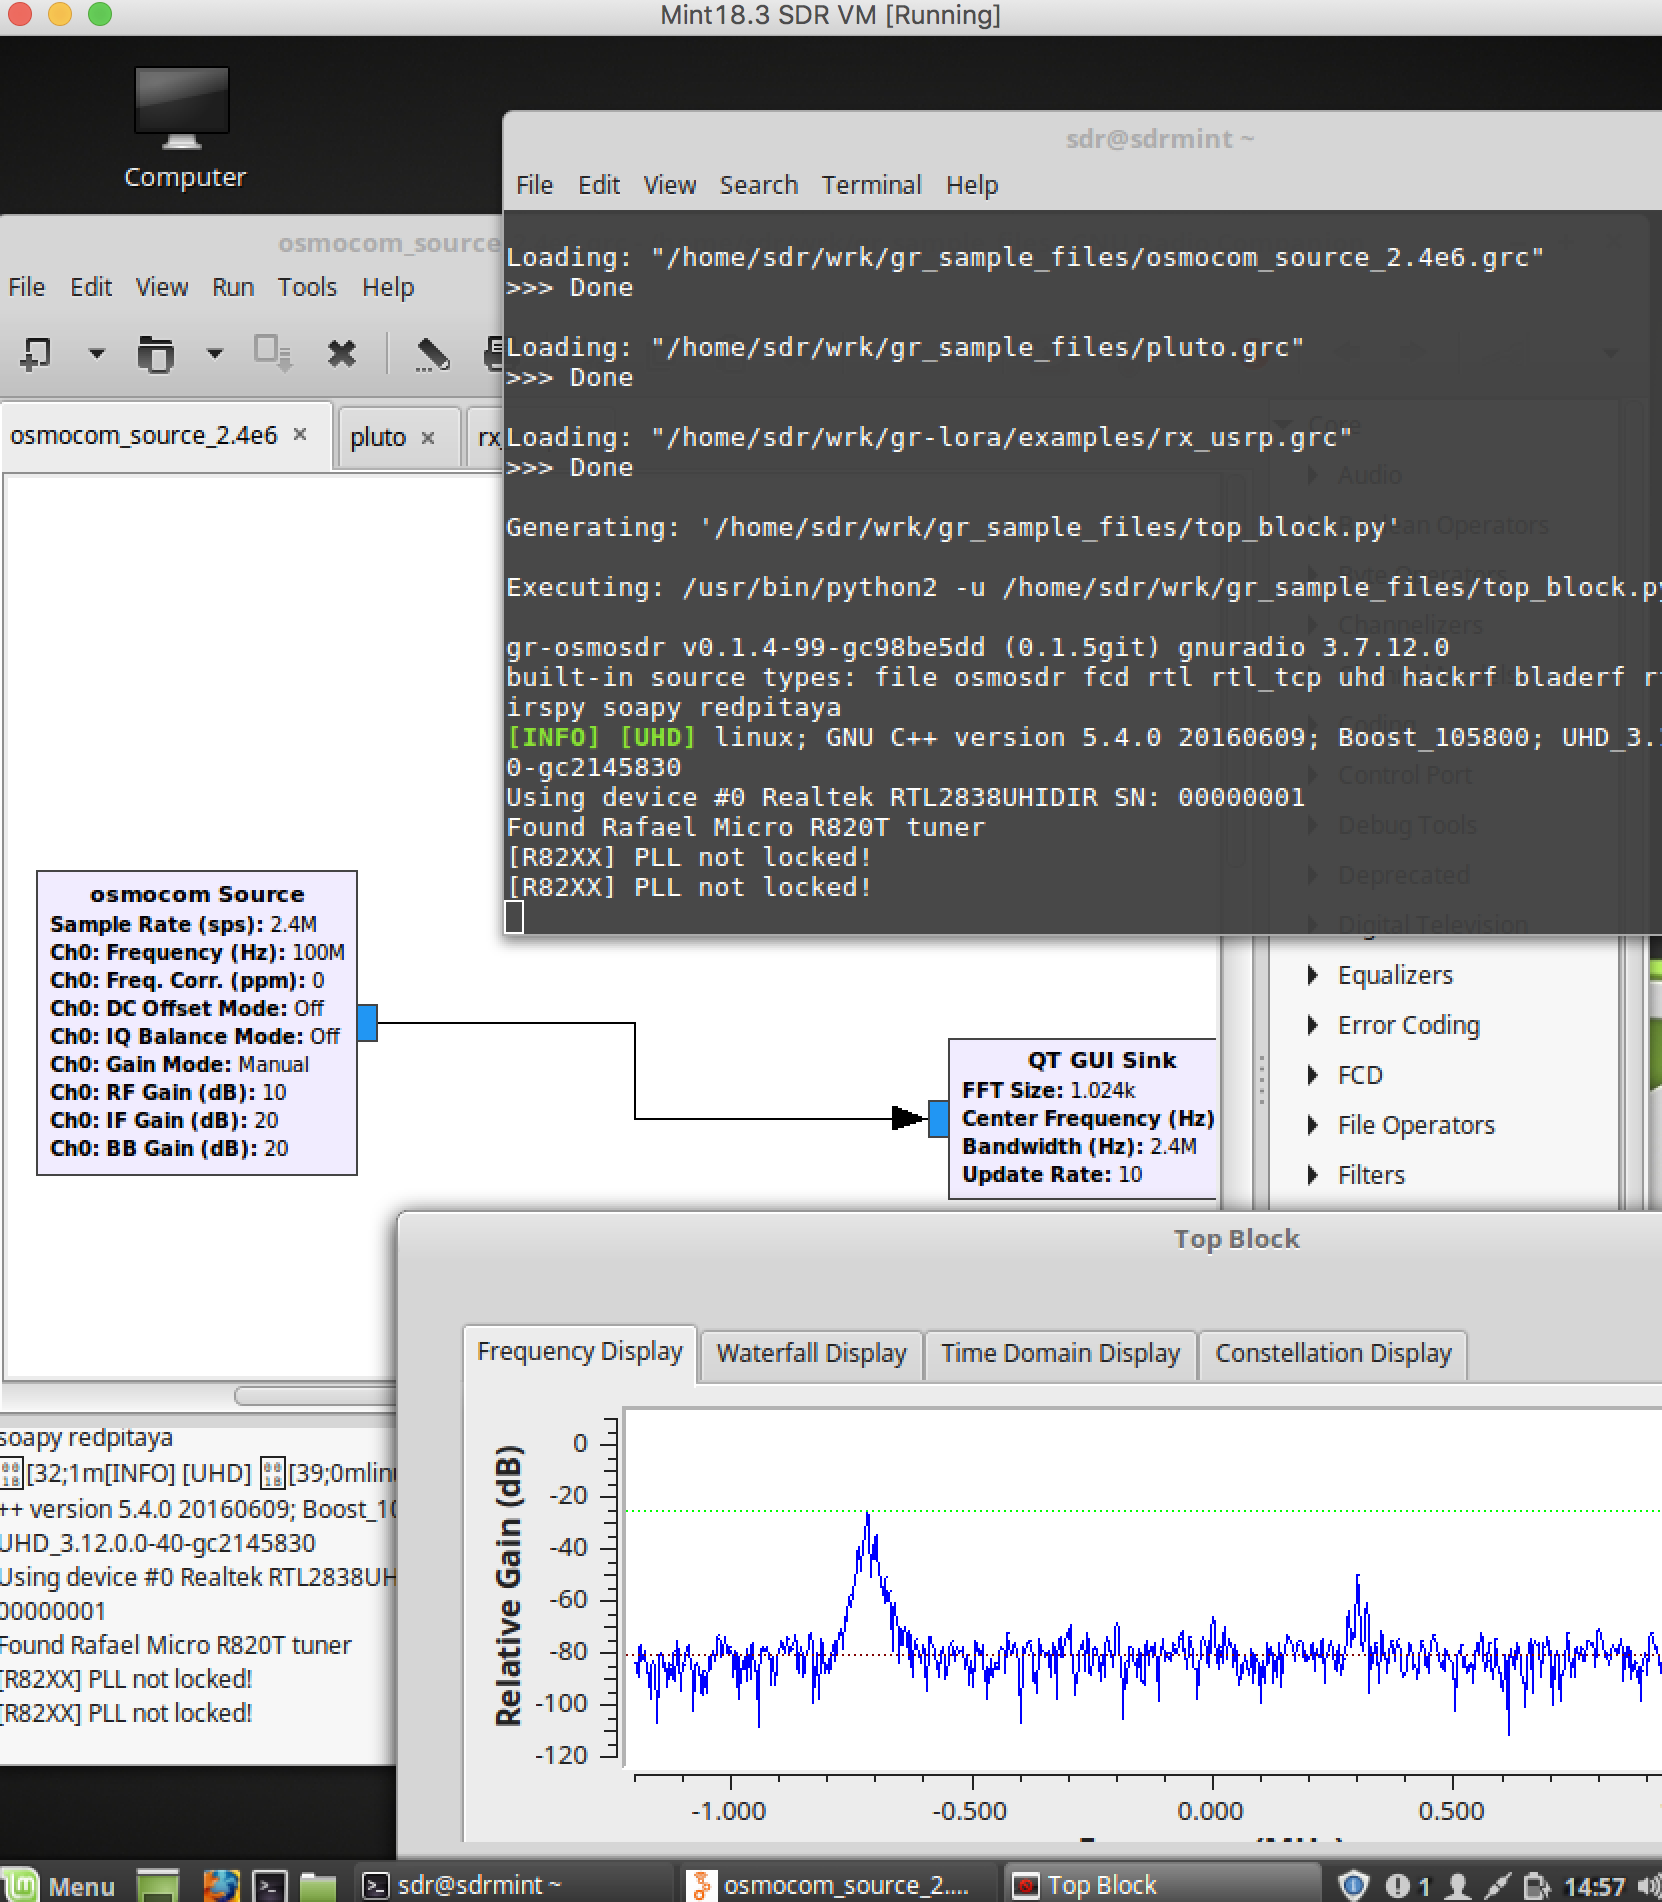
Run GRC
type command: gnuradio-companion
GNU Radio Companion (ready for UHD, RTL-SDR, ADALM Pluto, RedPitaya, Airspy)
Note: We’ve installed all GNU Radio stuff in the prefix path. Do not try to mix stuff with packages installed from the distribution’s Package manager… Do not simply install via ``sudo apt install gnuradio`` …etc… …since this will mix up things. Be careful when installing third party PPAs to not mess up your setup.
Run GQRX
You can now run the following tools from a terminal!
gqrx (UHD, RTL-SDR, RedPitaya, Airspy)
command: gqrx
Use RTL-SDR with GQRX:
Start GQRX by typing:
“gqrx” in a terminal
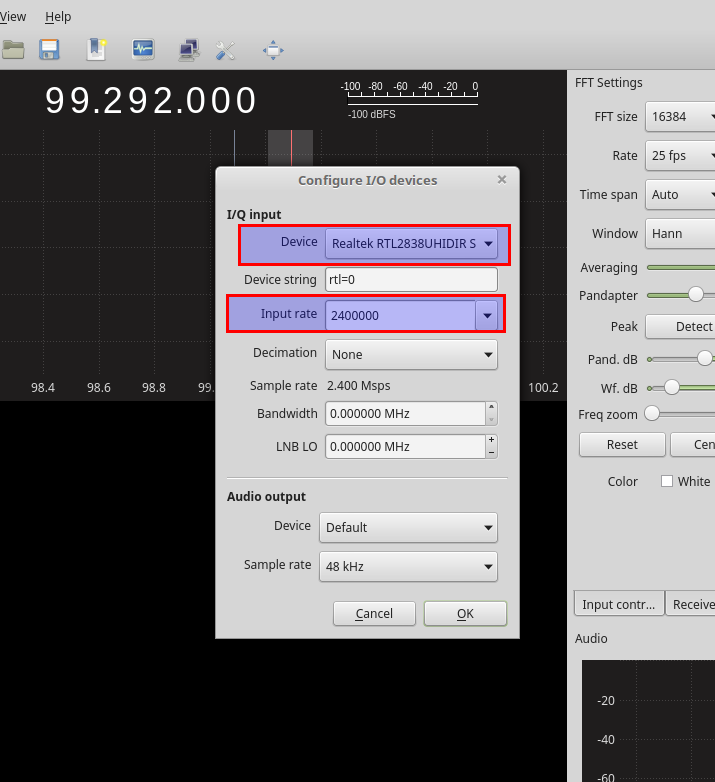
Select your stick and set an appropriate input sample rate.
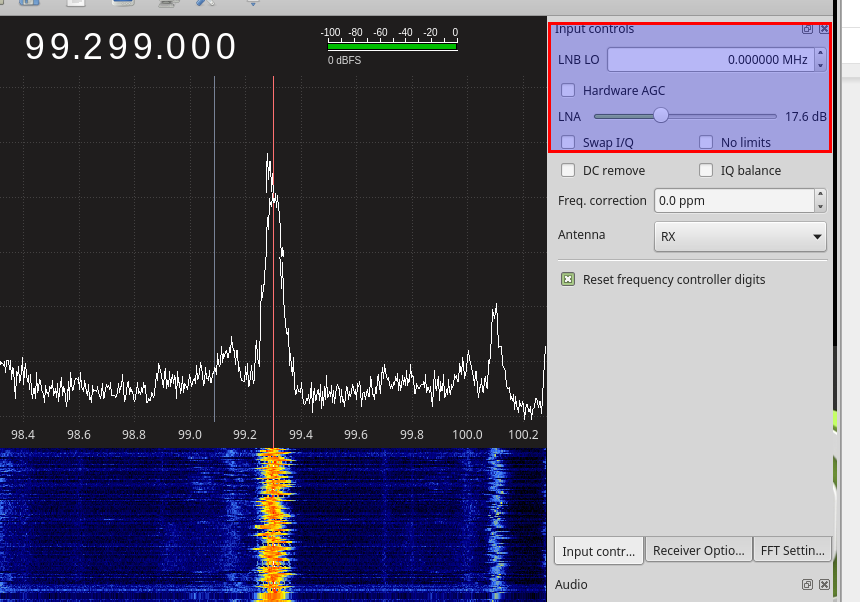
Try to find a good gain value for the signal of interest by finding the best distance between the noise floor and the signal peek
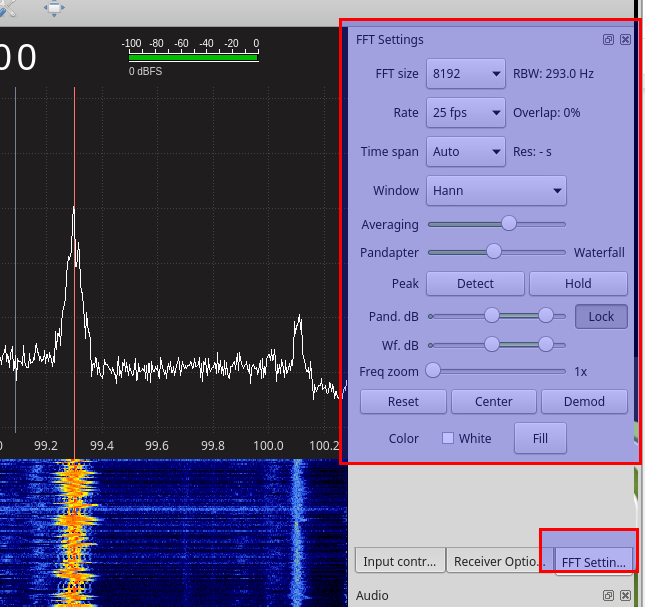
Experiment a bit with the FFT settings to get the best out the visualization
Building experimental stuff outside the prefix directory
When compiling libs from source, like special forks of GR-OSMOSDR etc… remember to adjust the target paths like shown with gr-lora above! If you don’t want to set your well working GNU Radio prefix directory at the risk of getting messed up, you can compile and install experimental stuff towards a total different target location.
Let’s say you got a brand new SDRPlay and need the non-standard gr-osmosdr source, from a 3rd party source repo to go for a test drive.
For SDRplay, first install the proprietary driver system wide. Download the API/HW Driver.
When Downloaded run:
chmod +x ~/Downloads/SDRplay_RSP_API-Linux-2.13.1.run
sudo ~/Downloads/SDRplay_RSP_API-Linux-2.13.1.run
sudo ldconfig
Now build checkout the special sdrplay2 branch of the gr-osmosdr fork from sdrplay. We want gr-osmosdr build results installed within our home directory in a separate folder, /home/sdr/libs/gr-osmosdr-sdrplay
cd ~/wrk
git clone https://github.com/sdrplay/gr-osmosdr
cd gr-osmosdr && git checkout sdrplay2 && mkdir build && cd build
mkdir -p ~/wrk/libs/gr-osmosdr-sdrplay
cmake -DCMAKE_INSTALL_PREFIX=~/wrk/libs/gr-osmosdr-sdrplay -DENABLE_NONFREE=yes -DENABLE_BLADERF=OFF ..
make && make install
To make GNU Radio, GQRX etc make sure to pick up the shared libraries from your experimental directory, set the LD_LIBRARY_PATH & PYTHONPATH to the target directory.
LD_LIBRARY_PATH=~/wrk/libs/gr-osmosdr-sdrplay/lib:$LD_LIBRARY_PATH
PYTHONPATH=~/wrk/libs/gr-osmosdr-sdrplay/lib/python-2.7/dist-packages:$PYTHONPATH
Within that shell you can now start gnuradio-companion or gqrx and find the SDRplay as OSMOCOM-Source.
-> When sure, you want to target your prefix directory, the cmake switch would be -DCMAKE_INSTALL_PREFIX=~/wrk/grc_wrk/default
If using an original RSP1, a few lines need to be added to /etc/modprobe.d/blacklist.conf by
sudo nano /etc/modprobe.d/blacklist.conf
Enter at the end of the file:
blacklist sdr_msi3101
blacklist msi001
blacklist msi2500